How to use an MCP Server

In the previous article I wrote a piece on Model Context Protocol (MCP). We saw the mental model and workflow of MCP. Do read on it, if you aren't clear on what an MCP is.
This article is a quick win guide on using the available MCP servers. Let us look into where to find them, how to set them to your LLM Client (VS Code in our example).
Pre-requisites
-
Install and Setup VS Code or update to the latest version.
-
Connect your VS Code with Github. If you do not have a Github account, what are you waiting for? Create it. It is free.
We connect VS Code with Github bacause of GitHub Co-pilot.
Github co-pilot has some of the latest LLM Models, and offers it to you for free (with some limits of course). Running the MCP Server is also simplified in VS Code. And later we can also custom design our own MCP servers.
Whenever we run the MCP in VS Code, we run it on agentic mode. We shall see it in action shortly.
-
Install Nodejs in your system.
-
Install Azure CLI for your environment. Because we are using Azure DevOps MCP in this Demo.
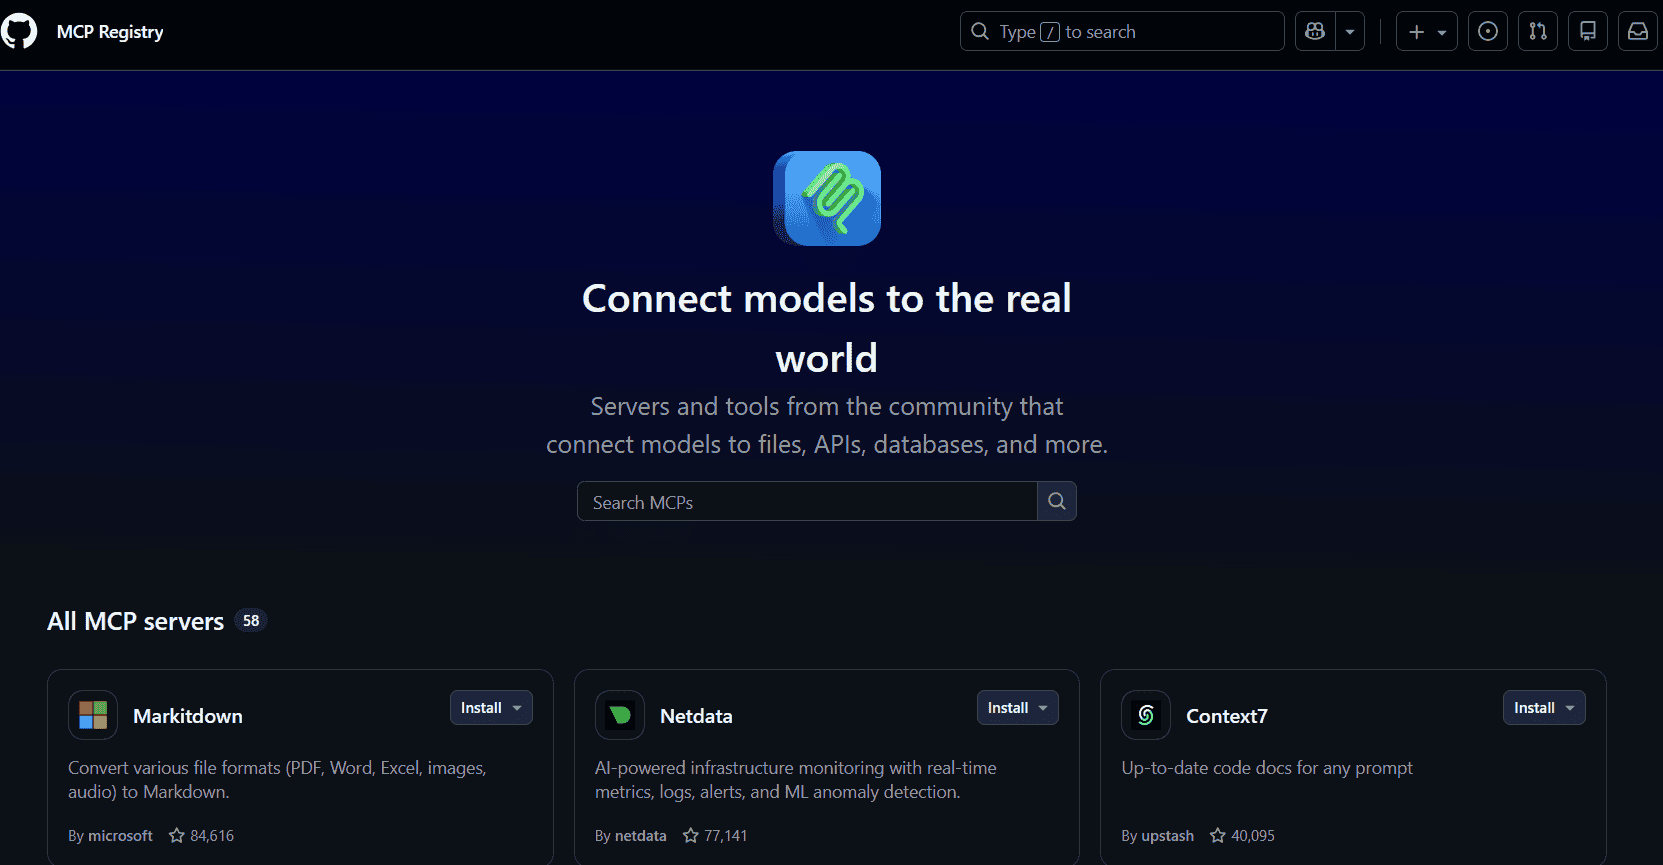
Where to find MCP servers?
Many companies have released their official verison of MCP servers. You can find them ideally in the company websites or thier GitHub accounts. Recently, Model Context Protocol team officially announced the launch of MCP Regitry. You may try and explore what is available from the Official MCP Registry.
For the purposes of VS Code and Github Copilot, we can find the MCPs in the GitHub Copilot MCP Registry
No BS 5 Steps to set up and use MCP (for Azure DevOps MCP Server)
-
Open VS Code in an empty folder, this is called workspace in VS Code. We configure MCP in the workspace level to ensure we can easily debug for any issues.

-
Create '.vscode' folder inside the root of your current workspace, create
mcp.jsonfile under it.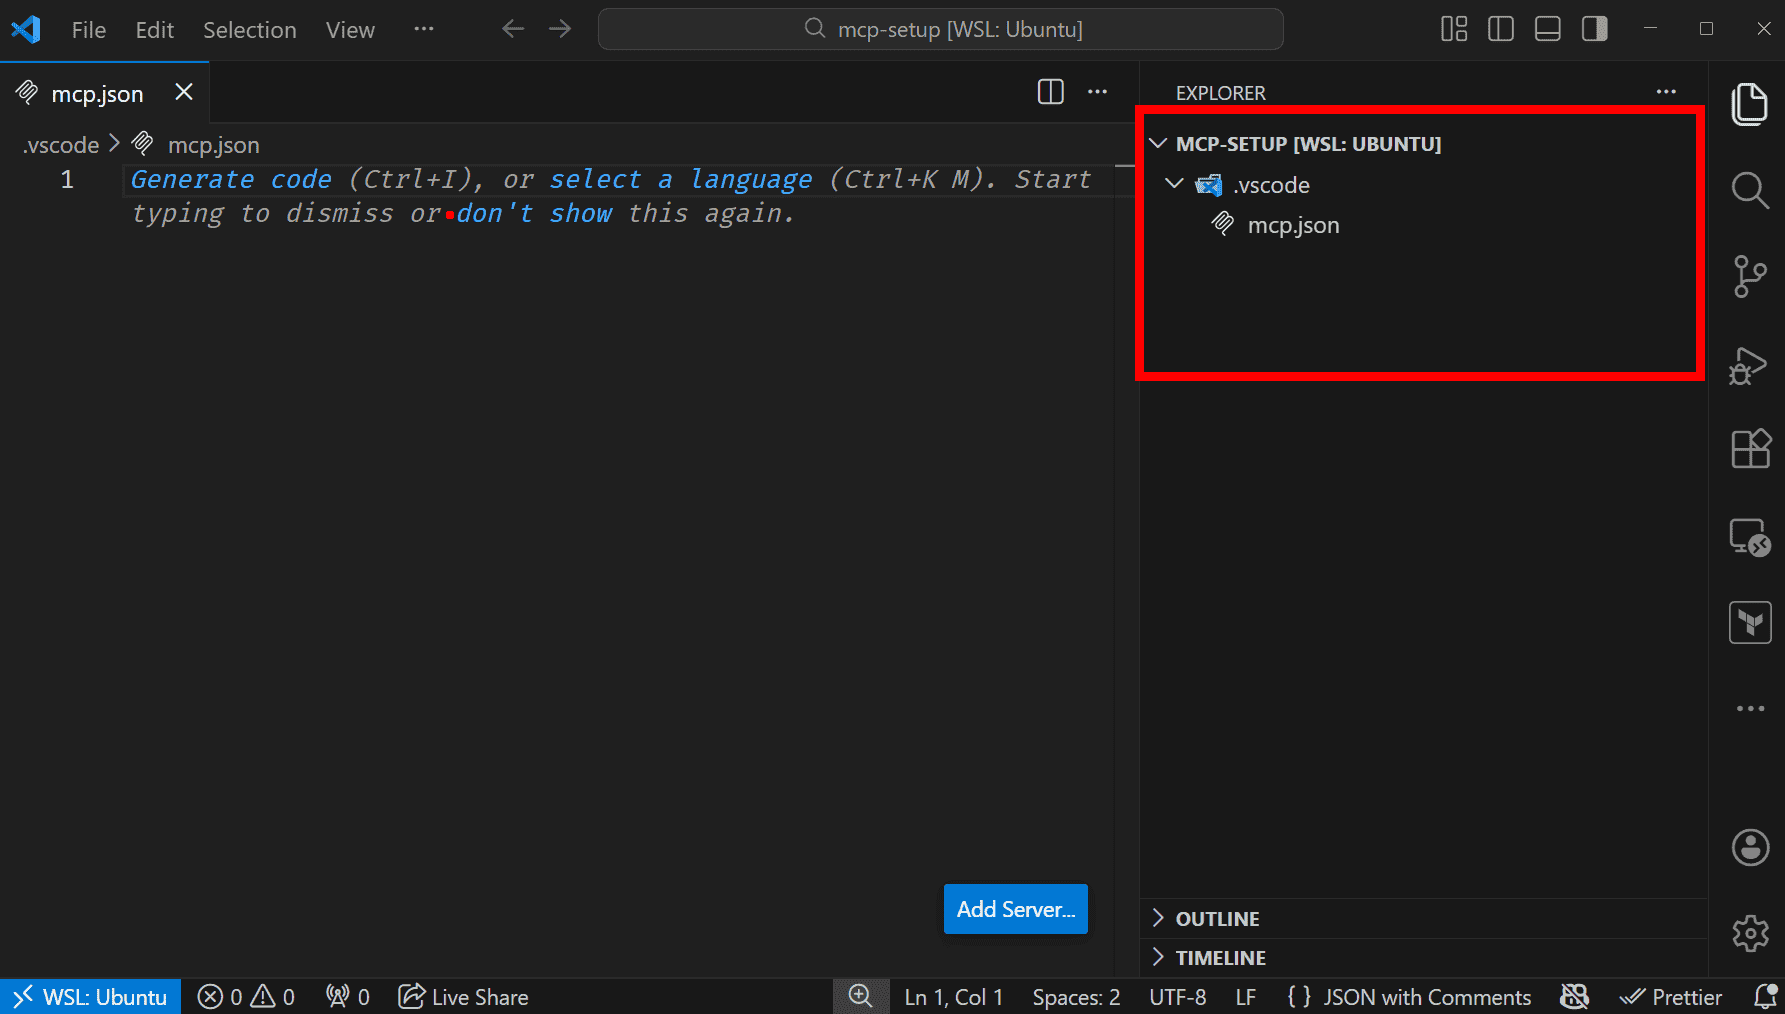
-
Add the following in
mcp.jsonfile to configure Azure DevOps MCP server and save the file. Option to start the server must appear in the file:{ "servers": { "azure-devops": { "type": "stdio", "command": "npx", "args": ["-y", "@azure-devops/mcp@latest", "${input:ado_org}"] } }, "inputs": [ { "id": "ado_org", "type": "promptString", "description": "Azure DevOps organization name", "password": false } ] }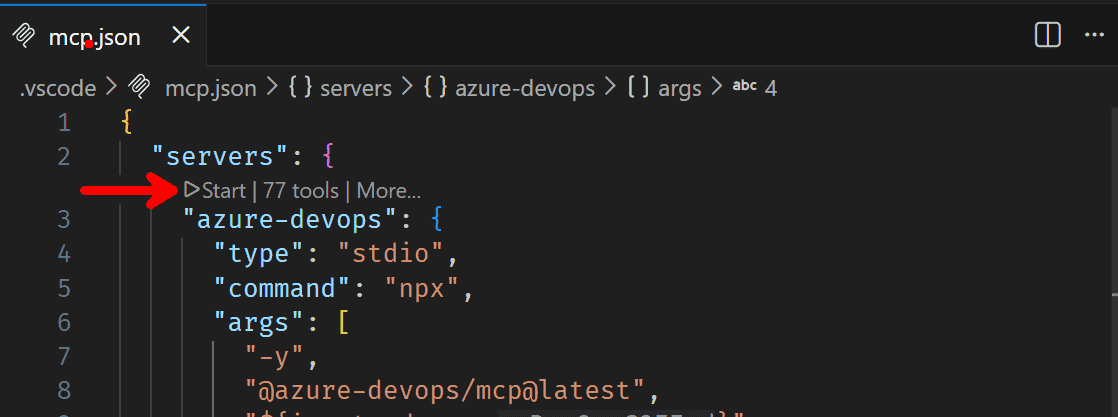
-
Open integrated terminal in VS Code and run
az login --allow-no-subscriptionsto login to Azure in the CLI.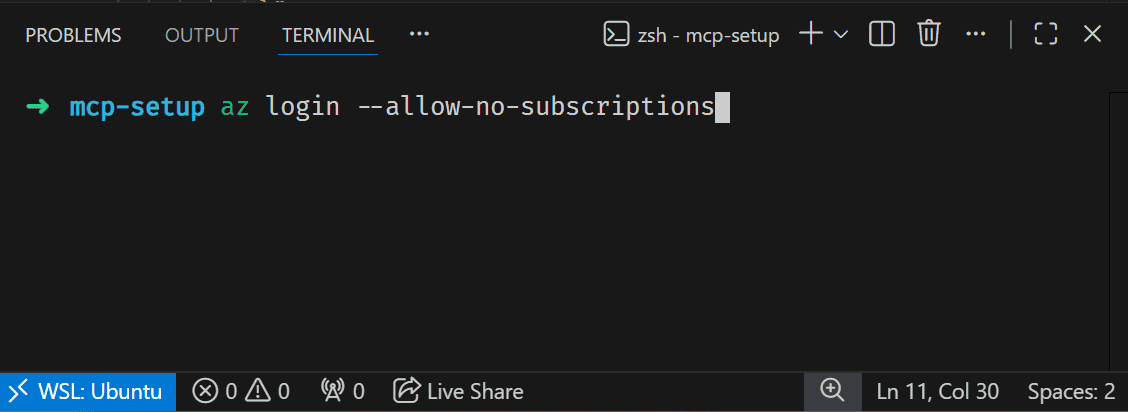
-
Open Chat Mode in VS Code with
ctrl + alt + i, switch to agent mode and prompt to get responses from your Azure DevOps Organization.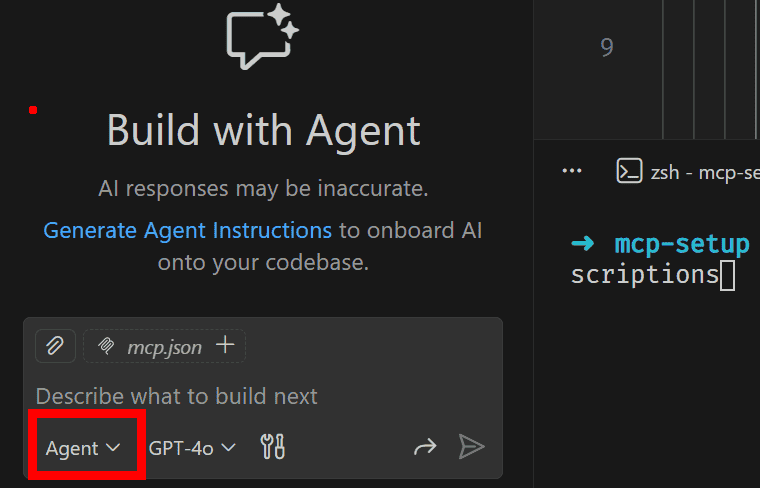
Note: You may need to restart VS Code after step 3.
Troubleshooting:
Starting, Stopping or Restarting the MCP Server:
Navigate to Extensions section in VSCode ctrl + shift + x and check for MCP Servers - Installed dropdown:
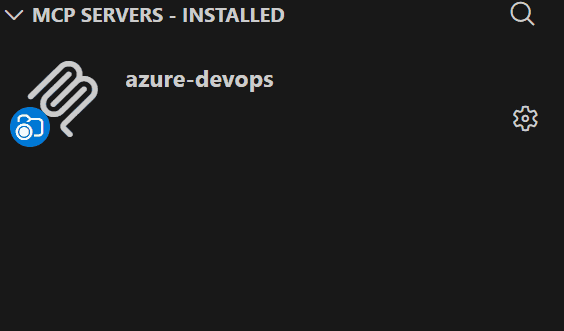 Here it will display all the MCP servers installed in vscode.
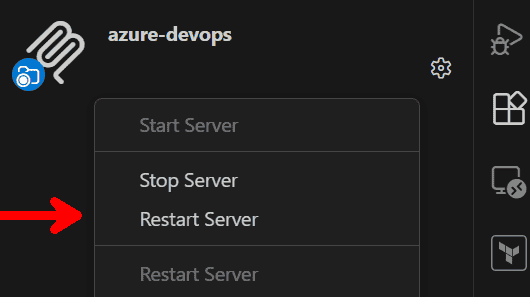
- Click on Gear icon for the MCP server.
- Click on Start, Stop or Restart options as needed.
In case you are unable to connect to Azure DevOps, you may need to provide the Tenant ID for the Azure DevOps manually.
- Go to Azure DevOps Organization > Organization settings > Microsoft Entra to get Tenant ID.
- Add
--tenant,${input:ado_tenant}in theargs:inmcp.jsonfile
Final mcp.json config file:
{
  "servers": {
    "azure-devops": {
      "type": "stdio",
      "command": "npx",
      "args": [
        "-y",
        "@azure-devops/mcp@latest",
        "${input:ado_org}",
        "--tenant",
        "${input:ado_tenant}"
      ]
    }
  },
  "inputs": [
    {
      "id": "ado_org",
      "type": "promptString",
      "description": "Azure DevOps organization name",
      "password": false
    },
    {
      "id": "ado_tenant",
      "type": "promptString",
      "description": "Azure DevOps tenant ID (required for multi-tenant scenario)"
    }
  ]
}
You might be unable to access some information from Azure DevOps as well. In this case, check with your user access in Azure DevOps account.
Optimizing the usage of MCP in VS Code
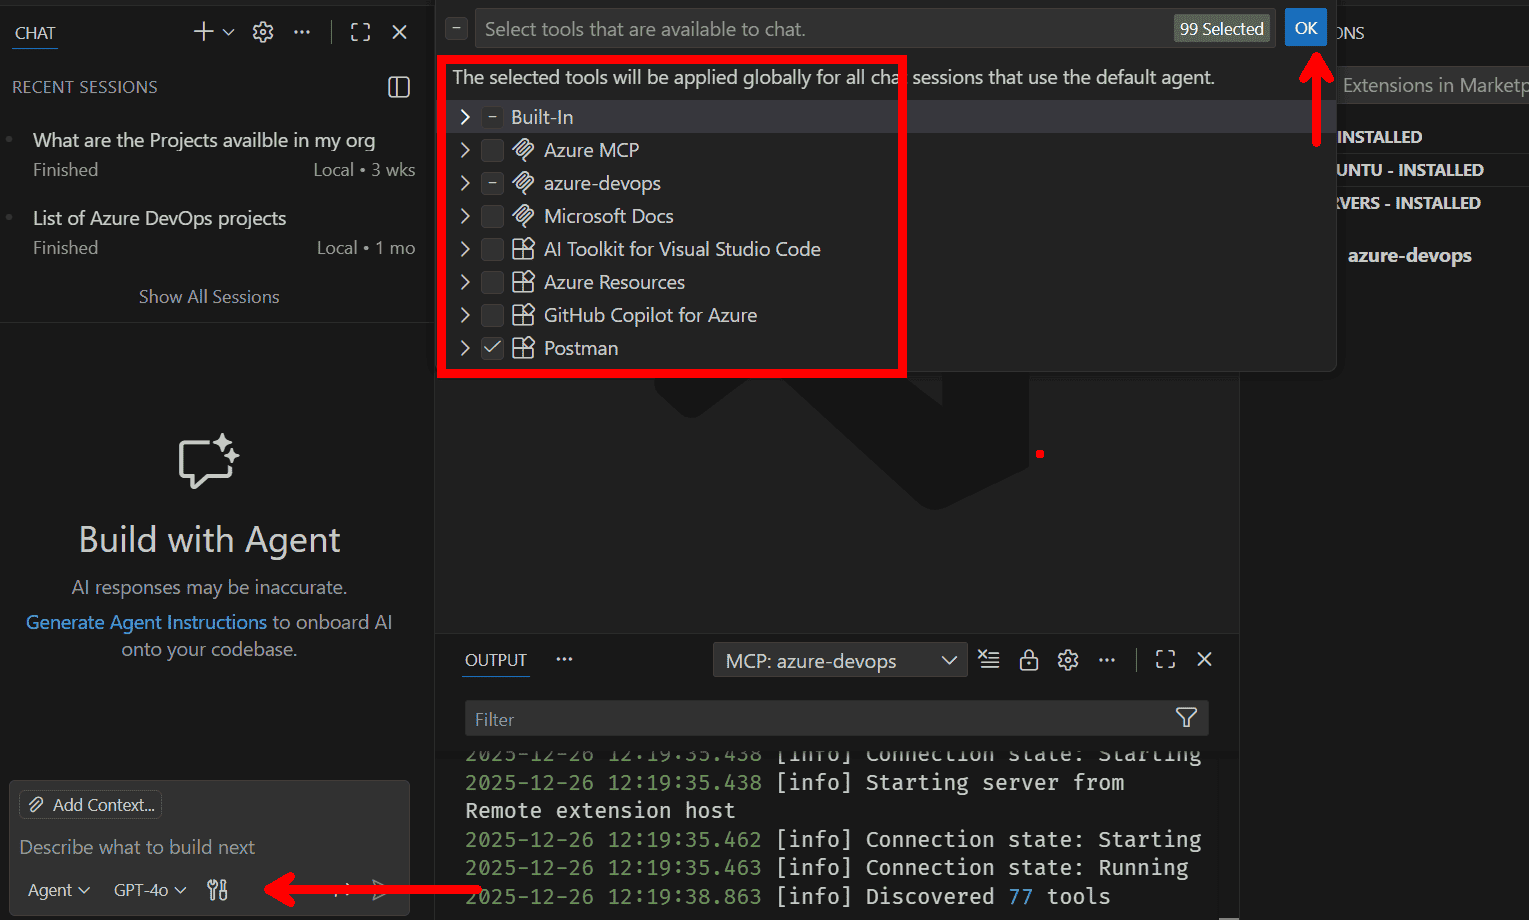
This is a short note: you must be careful in installing MCP and using the tools that are avaiable.
Whenever you are prompting in the copilot chat in the VS Code, make sure to check which tools have been selected.
There exists autodiscovery of MCP Servers, which is a nice feature to have but it soon turns into a mess if you have many different MCPs installed.
Also read on Model Context Protocol and the "too many tools" problem.
To summarize, VS Code automatically loads all the tools in the LLM context. And for every prompt you give, this tool metadata will be added into your chat conversatin every single time. If your use case is simple, then every prompt will have high cost for a simple task to solve.
For example: you have a use case of solving only Azure DevOps related problem and you prompt it in the GitHub Copilot Chat. Your prompt will be including every tool. If you have installed Azure MCP or Postman MCP, even that will be sent to the LLM.
The LLM cost is defined by the input and output tokens. Adding these extra context will definitely cost you higher for your chat conversations. Although GitHub Copilot has a limit of 128 tools Claude Desktop has a limit of 40 tools, it's better to control which tools are given as a context to the LLM.
It is very straightforward to achieve this in GitHub Copilot Chat.
- Click on the tool icon in the chat:
- De-selet or select the specific tool you need for your use case.
Of course it becomes very tedious to manually enable and disable tool for your chat conversation every time for a secific use case.
Therefore, as engineers, the next step is to design a system that would automate this part for us. That's where designing custom MCPs and Agentic AIs come into picture.